Thursday, April 30, 2015

Salsa Ranch Chicken Enchiladas

I love enchiladas of all kinds, but this one is probably one of my favorites. It's pretty easy to put together and it's also a unique variety of enchiladas.


Place frozen chicken in a slow cooker and sprinkle on the taco seasoning and ranch dressing mix. If you don't use frozen chicken, make sure to cook for less time. Pour chicken broth over chicken,  and cook on low for 6 hours.  


Once chicken is cooked, place chicken in another bowl to shred, saving the broth from the crock pot.  Mix green chilies with the chicken. Mix some of the broth into the chicken mixture. I used about a cup. You want to add enough that the chicken is pretty moist, without it being soupy.


Divide the chicken mixture evenly to spread across 8-10 tortillas. Divide about 2.5 cups of the cheese and sprinkle on top of the chicken mixture.  Our family really enjoys cheese, but if you are trying to be healthy then you can use less. Roll up and place in a lightly greased 9x13 baking pan.


Bake at 350 degrees for 10 minutes.  

Combine ranch dressing and salsa and pour over baked enchiladas. The amount of sauce varies on how much sauce your family enjoys, we are sauce people so we tend to do the 3/4 cup mixture. Sprinkle remaining cheese  on top of the ranch and salsa enchiladas. Cook for another 10 minutes, or until cheese is completely melted.


Salsa Ranch Chicken Enchiladas
Recipe adapted from Six Sisters Stuff
Ingredients: 
4 chicken breasts (frozen)
1 packet taco seasoning
1 packet ranch dressing mix
1 (14.5 ounce) can chicken broth
1  can of green chilies (4.5 oz)
8-10 flour tortillas
3.5 cups shredded pepper jack cheese (divided) (you can do less we are just cheese addicts at our house)
1/2 - 3/4 cup ranch dressing
1/2 - 3/4 cup salsa

Directions:
Place frozen chicken in a slow cooker and sprinkle on the taco seasoning and ranch dressing mix. If you don't use frozen chicken, make sure to cook for less time. Pour chicken broth over chicken, and cook on low for 6 hours.  

Remove chicken from the slow cooker and shred, save the broth from the slow cooker.  Mix green chilies with the chicken. Mix some of the broth into the chicken mixture. I use about a cup. You want to add enough that the chicken is still pretty moist, without it being soupy.

Divide the chicken mixture evenly to spread across 8-10 tortillas. Divide about 2.5 cups of the cheese and sprinkle on top of the chicken mixture.  Roll up and place in a lightly greased 9x13 baking pan.  

Bake at 350 degrees for 10 minutes.  

Combine ranch dressing and salsa and pour over baked enchiladas. The amount of sauce varies on how much sauce your family enjoys, we are sauce people so we tend to do the 3/4 cup mixture. Sprinkle remaining cheese on top of the ranch and salsa enchiladas. Cook for another 10 minutes, or until cheese is completely melted.

Enjoy!


What are some of your favorite types of enchiladas?


Tuesday, April 28, 2015

No-Sew Pixie Dust Pouch


Do you have a little pirate or fairy at your house?  My kids love the Disney show Jake and the Neverland Pirates.  We go on pirate and fairy adventures every day.  I first made this pixie dust pouch to go with little C's Halloween costume last year, when she went as one of the main characters from the show.  This has become quite the popular toy at our house, especially when friends come over.  It literally takes about a minute to make and you probably have all the stuff to make it in your craft box.


Materials Needed:

scrap pieces of felt (any color you want)
yarn (any color you want)
cotton balls or additional scrap pieces of felt


Directions: 
Start by cutting a 5x7 piece of felt.


Place a couple of cotton balls in the middle, or use the the scraps of the felt that you cut to fill in the pouch.


Fold the edges over, make sure that all the sides are covered and none of the cotton balls are showing.


Cut a piece of yarn.  You'll want it long enough to tie around the pouch and then tie into a necklace.  For my 2 year old, 40 inches was a good length.  Adjust the length to fit your kids.  I always like to err on the side of too much rather than not enough.


Tie the yarn around the pouch.  Make sure all the edges are tied.  I do a double knot and then wrap it around to the other side and pull it tight and do another double knot.  Tie as many as you need until it feels really tight and secure.


 My kids like to wear this like a necklace so at this point you can measure how long you want it up to your child and cut off excess yarn if you have some.  Tie the ends into a square knot and you're done.  If you want to cut around the edges to make it look more pirate-y you can or you can leave it as is.


There you have it. These would make cute party favors for a birthday party or as a gift for the pirates and fairies in your life!


And just for fun I have to post this cute picture of one of my little pirates with her pixie dust.


Thursday, April 23, 2015

Home Printables

It's that time of the year where I am not quite sure what type of printable to have up since there aren't really any holidays right now but I still like to have something on my shelf where I keep the printables. I found this quote and thought it was super cute so I made a printable that went along with my living room theme.


Red Home Printable JPG
Red Home Printable PDF

Since blues and greys are pretty in right now I also made one in those colors.


Blue Home Printable JPG
Blue Home Printable PDF

Let me know if there are some other color combos you would like to see in a printable, and I might be able to add that as well.


Tuesday, April 21, 2015

Pizza Gnocchi

My family loves potato gnocchi and I'm always trying new recipes that use it.  We just can't get enough!  The other day we had some extra pizza sauce and pepperoni from pizza night so I came up with this quick dish for lunch and it was a hit.  It's fast, simple and delicious.  Enjoy!


Pizza Gnocchi
Recipe By: Prescriptions for Happy Home

Ingredients:
1 package Potato gnocchi
20 slices of Pepperoni, cut in half (You can add any other pizza toppings you may have on hand, too)
1 cup Pizza sauce
1/4 cup Parmesan, grated
1/2 cup Mozzarella cheese
Fresh basil, optional

Directions:
Cook potato gnocchi according to package directions.  Drain the gnocchi and add back to the saucepan with the pizza sauce, pepperoni (or other toppings) and Parmesan cheese.  Stir to combine and cook over medium low until heated through.  Sprinkle individual servings with mozzarella cheese and fresh basil if desired.

Makes 4 servings


What are your favorite gnocchi recipes?  Comment below!  

Thursday, April 16, 2015

DIY Animal Puppets

My daughter loves animals. These animal puppets are easy to make and she loves them! We have them in our quiet book for our Noah's Ark page, but they are also just as fun by themselves. I have also used these as gifts!


Materials:
  • Felt Scraps (the colors will depend on the animals you chose and what colors you do for the animals)
  • Needle and thread (ideally matching the felt)
  • Spray Adhesive (optional but does make it nice)
  • Sewing Machine (could do without but makes the process a lot easier)
  • Pattern pieces 

First step is to print out the pattern pieces and then use those as guides to get out your felt. I tried to color coordinate my pieces but you can obviously use whatever colors you want.


For this tutorial, I just made the elephant, bear, and monkey.

Here are my cut out pieces:


I chose to work on the faces first but you can do it in whatever order you want.

If you chose to glue your pieces on:

I used this spray adhesive and spray it on a paper plate and then I dip the brush in the glue and then brush the glue on the small pieces to add to the head.


If you sew it, try to use thread the same color as the top piece of felt and carefully sew around the piece in even stitches.

I use both methods and I think a lot of it is personal preference (and if you have the right thread color). I didn't have a cream color thread for the monkey so I glued it on so I wouldn't have to buy thread just for this puppet. I also found it easier to glue the stripes on the zebra rather than sewing them on.

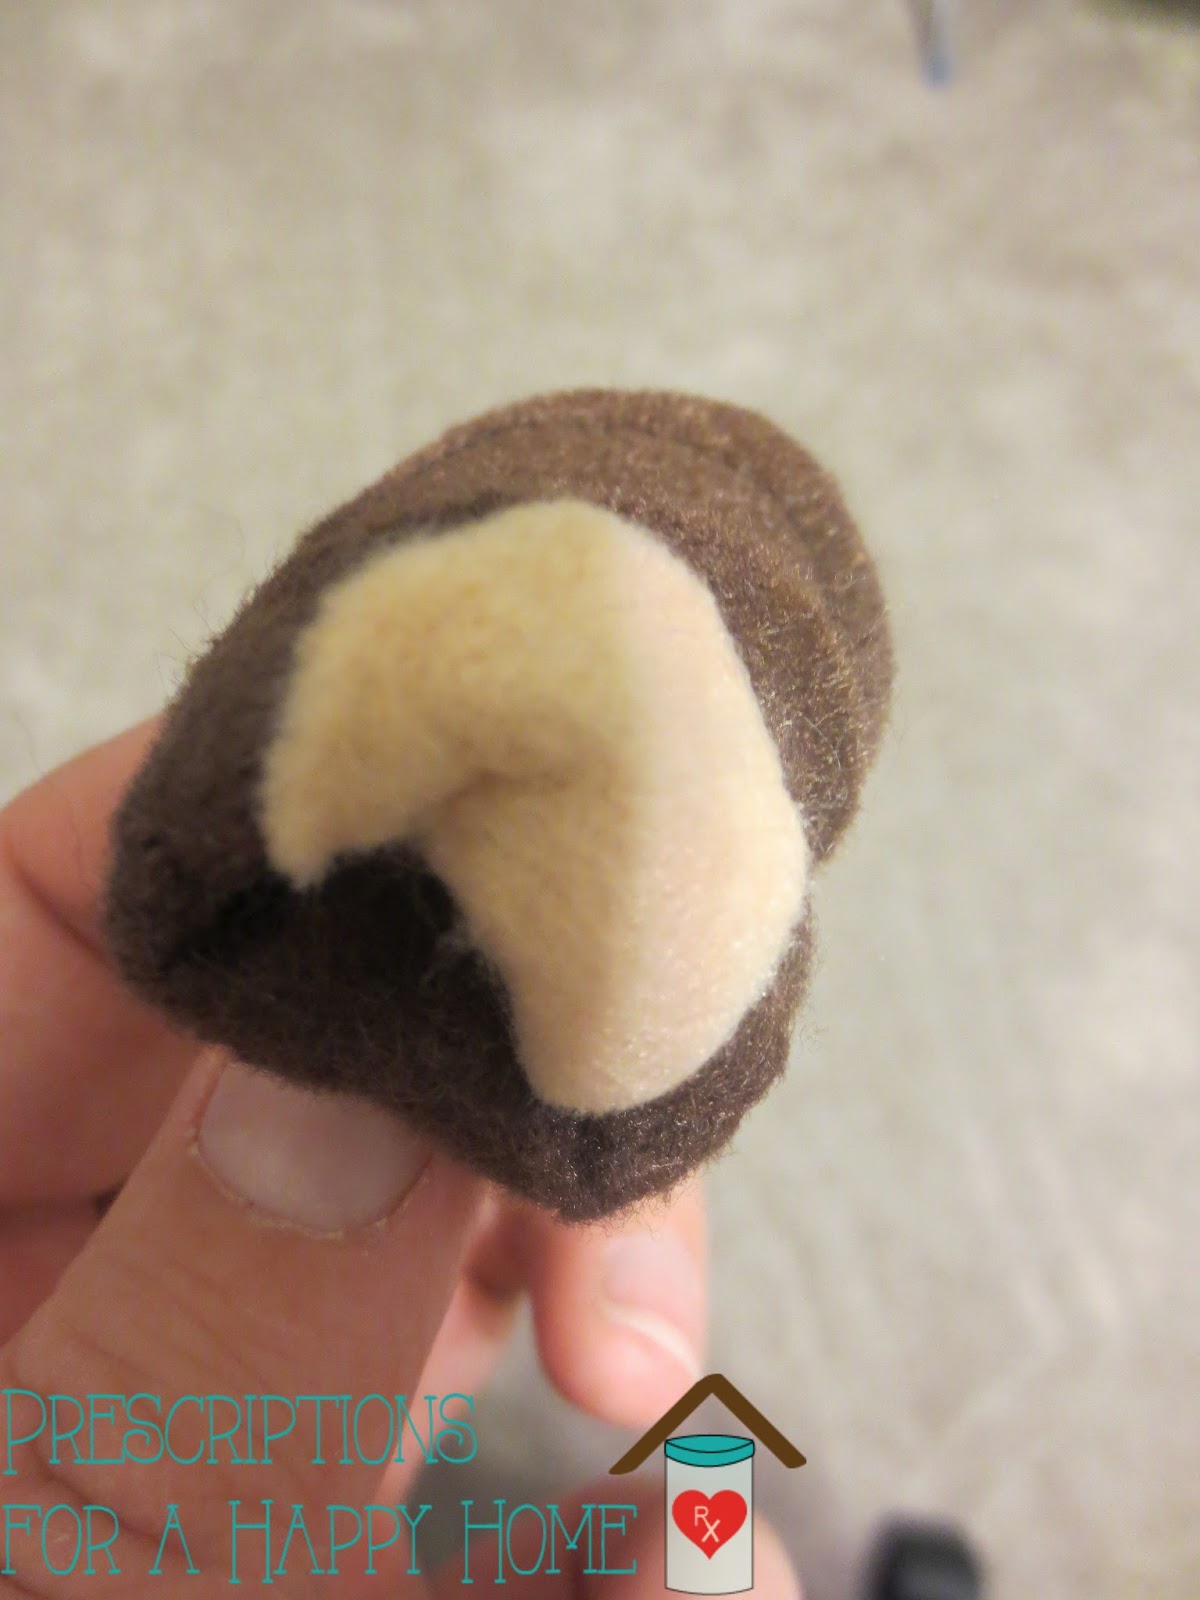
I stitched the eyes, by making a knot. I wrap the thread around the needle several times (about 7) and then put the needle back down into the felt. You can also make the eyes by stitching by the eye several times until you get the size of eye you would like.


The finished faces:


I didn't add the bear's ears until the face was attached to the body. You can add it now though if you prefer.

For the monkey, giraffe, and zebra you will want to add all of the details to the body before sewing the body together. For the monkey, I just glued the belly piece in the center of one of the brown body pieces. Put the pieces right side together, or in other words have any of the detailed pieces be facing inward so you no longer see it.

Using a sewing machine, stitch around the edge of the body. I sewed as close as I possibly could to the edge.


Be sure to back stitch at the ends so the stitches won't unravel as you flip.

Flip the puppet so it is now right side out.


Attach the head to the body of the puppet by carefully stitching the back layer of the body with the head. (You will want to sew carefully so you do not accidentally sew the puppet closed!). You can use a basic running stitch, but really any stitch should work.


Now you have cute puppets that should hopefully get a lot of love!


Tuesday, April 14, 2015

Crunchy Cabbage Salad

With Spring here (hopefully to stay) and summer just around the corner I wanted to share this delicious salad recipe.  This easy salad is perfect for potlucks, picnics and even baby showers.  Sometimes I like to serve it with fried rice for a light dinner.   


To make this salad you'll need a large head of cabbage, chopped into bite size pieces.  Rinse the cabbage well and add it to a large mixing bowl. 


Next add some chopped green onions, toasted sesame seeds, sliced almonds and diced chicken.


Then sprinkle the seasoning packets from the Ramen noodles over the salad.  Set aside the noodles for later. 


Mix the seasoning packets into the salad and then add the dressing and mix until combined.


If you aren't going to eat it right away, cover the salad with plastic wrap and put it in the fridge until you are ready to use it.   I like to let it sit in the fridge for about four hours before serving to let the flavors develop more, but if you're short on time you can continue to the next step right away.

Right before serving, break up the Ramen into small pieces and add them to the salad along with a can of drained mandarin oranges.  I sometimes cut the mandarin oranges in half so there's more to go around.  Stir them in gently so the oranges don't break up into tiny pieces. 


Serve right away and enjoy!  The perfect spring/summer salad.


Crunchy Cabbage Salad
By: Prescriptions for a happy home

Ingredients:
Salad:
1 large head of cabbage, chopped into bite size pieces
3-4 green onions, sliced
2 c. cooked chicken, diced
2 T. toasted sesame seeds*
1/4 c. sliced almonds
2 pkgs. chicken flavored Ramen noodles
1 (11oz.) can mandarin oranges, drained
Dressing:
1 T. sugar
1/2 c. canola oil
1/2 tsp. pepper
1 tsp. salt
1 1/2 tsp white vinegar

Directions:
Rinse the cabbage well and add to your mixing bowl.  Ad the green onions, chicken, sesame seeds and almonds.  Mix well.  Sprinkle the Ramen seasoning packets over the salad.  Mix well.  In a small bowl, combine the dressing ingredients and mix until combined.  Add the dressing to the salad and stir until all of the cabbage is coated.  Place the salad in the fridge for about 4 hours to let the flavors develop.  When ready to serve, break up the Ramen noodles into small pieces and add them to the salad with the mandarin oranges.  Stir gently to combine and serve.   


*to toast the sesame seeds put them into a small, dry skillet over medium heat, stir them around until the seeds are lightly browned about 3-5 minutes