Showing posts with label Party. Show all posts

Wednesday, September 9, 2015

BYU Football Party Ideas with Free Printables!


Football season is here! Our BYU Cougars won their first game and we are excited to cheer them on again this week.  Print out these free games to use at your next BYU Football Party!   


Cougar Fight Song Fill in the Blank

Cougar Fight Song Printable (PDF)


BYU Word Search

BYU Word Search Printable (PDF)

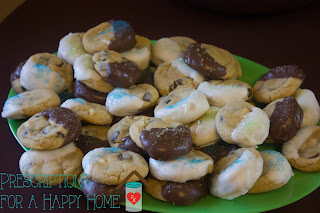
No football party is complete without yummy food! Add some of these easy blue and white treats to your next football food spread.

Chocolate covered pretzels.  Melt some white baking chocolates and dip half of the pretzels in the white.  When you have about half of the chocolate left add a couple drops of blue food coloring to make your blue pretzels.  Add some blue white sprinkles if desired.


Use a bag of blue tortilla chips and regular white tortilla chips and mix them together.  Serve with hummus/guacamole/salsa.


Get a bag of Almond Joy Pieces and just put out the blue and white ones.  Use blue Gatorade or Kool-Aid for drinks.


Happy Football Season!

Go Cougars!!


Thursday, July 2, 2015

Medical School Party

We didn't really know any of the other first years when we first came out here to start school. My husband Nic, quickly became friends with Steve and Jeff. They studied together and hung out together a lot at school This meant that the guys wanted to get together outside of school which allowed us wives to get to know each other really well.  Ever since first year, the guys decided it would be fun to have a Cafe Rio Party sometime. Well, I am sad to admit we never granted their wish.....until now.

Kim and I were talking a few weeks ago about wanting to get together as families before both of our husbands head off to away rotations. As wives, we get together quite a bit but with different rotation schedules we hadn't hung out as entire families in awhile. We decided their (Nic, Steve, and Jeff's) dream of a Cafe Rio Party would finally come- and be a great way to celebrate being done with 3rd year (and rotations).


We decided we would have some fun with everyone and planned a little competitive game. This game would work great to start or end any medical school year. We did it by couples, husbands competing against their own wife. But we also kept track of the time so there could also be an overall competition.


For the husbands:

1st activity - They had to talk on the phone, explaining how to make a peanut butter and jelly sandwich, while doing either C's or E's hair.


Once they finished the girl's hair, the moved on the last station where they frosted a heart cookie and then decorated it with an EKG.


The wives:
We started with some surgery gloves, and had to put on the gloves in order to keep the gloves "sterile." Nic showed the wives the proper way of putting the gloves on - there is a special way of doing it. (Husbands watched to make sure we did it the right way).


Once the gloves were on, we had to play Operation. We only had 3 pieces in there (all different textures), if we were to do it again I would add another 1 or 2 pieces.


Just for fun, we switched roles near the end where the wives did the wive things while the husbands did the husband things. Both ways were a lot of fun!

We ended the night with some "Medical" Cookies.

Just cut the onesie to make it a scrub top. For the band-aid, take flower and just use the middle part from top petal to bottom petal.


Cookies left to right: bone, EKG heart, scrub top, two band aids, a pill, and a single band aid. If you make some, please post pictures we woul love to see your creativity!


Thursday, June 25, 2015

Give the "Scoop" on Baby Boy - Baby Shower Part 2

What's a party without some delicious food? The ice cream bar was fun to create, since it was the theme for the party.

The night before we prescooped the ice cream with inspiration from Oh Happy Day. We scooped up vanilla ice cream and cookie dough ice cream. We placed the ice cream on parchment paper that had been laid out on cookie sheets. (This needs to be done quickly so your scoops won't melt!). Keep them in the freezer until the scoops are hard and then transfer them to freezer bags. We used quart size and were able to fit 6 scoops per bag. This made it really convenient during the party since we only brought out a bag at the time and prevented too much ice cream from melting.

During the party, we placed the ice cream in glass bowls and the glass bowls were placed in metal bowls containing ice.


We made these Sundae cookes from Rose Bakes. 


We also had cookies and brownies.

Our toppings included: whipped cream, hot fudge, strawberry syrup, caramel, mini chocolate chips, mini m&ms (blue, green and brown), and sprinkles (blue, green, brown, and white).


We had the spoons in Sundae dishes tied with ribbon in the theme colors.


Guest of honor!


Christie, thanks for letting us throw this shower for you. Hope you had as much fun as we did!


Tuesday, June 23, 2015

Give the "Scoop" on Baby Boy - Baby Shower Part 1


Our friend is having a baby boy in August, and we wanted to throw her a baby shower. We thought an ice cream party would be the perfect summer way to celebrate.

We have found that Evite seems to work the best so we found a cute ice cream invitation on Evite and used that. Our message:

Come give Christie the "Scoop" on babies to celebrate her baby BOY! it's an open house so come anytime between 7 -9 pm and come prepared to give some advice.

We made and printed out these advice cards (printed 4" by 6"):

Download advice cards


Next to the advice cards, we had instructions and ideas for advice.
Download instructions


We used a little photo book (shown on right) where we put all of the advice cards so she could take them home and have them as a reference.

We used our color scheme to cover the whipped cream in blue and green scrap book paper.


Our friend Shelly made this cute banner that we used for the gift table.


Kim made these ice cream cone balloons using this tutorial 


It was fun to be able to socialize with everyone but also celebrate baby boy.

Thursday, I will show the ice cream bar!


Tuesday, April 28, 2015

No-Sew Pixie Dust Pouch


Do you have a little pirate or fairy at your house?  My kids love the Disney show Jake and the Neverland Pirates.  We go on pirate and fairy adventures every day.  I first made this pixie dust pouch to go with little C's Halloween costume last year, when she went as one of the main characters from the show.  This has become quite the popular toy at our house, especially when friends come over.  It literally takes about a minute to make and you probably have all the stuff to make it in your craft box.


Materials Needed:

scrap pieces of felt (any color you want)
yarn (any color you want)
cotton balls or additional scrap pieces of felt


Directions: 
Start by cutting a 5x7 piece of felt.


Place a couple of cotton balls in the middle, or use the the scraps of the felt that you cut to fill in the pouch.


Fold the edges over, make sure that all the sides are covered and none of the cotton balls are showing.


Cut a piece of yarn.  You'll want it long enough to tie around the pouch and then tie into a necklace.  For my 2 year old, 40 inches was a good length.  Adjust the length to fit your kids.  I always like to err on the side of too much rather than not enough.


Tie the yarn around the pouch.  Make sure all the edges are tied.  I do a double knot and then wrap it around to the other side and pull it tight and do another double knot.  Tie as many as you need until it feels really tight and secure.


 My kids like to wear this like a necklace so at this point you can measure how long you want it up to your child and cut off excess yarn if you have some.  Tie the ends into a square knot and you're done.  If you want to cut around the edges to make it look more pirate-y you can or you can leave it as is.


There you have it. These would make cute party favors for a birthday party or as a gift for the pirates and fairies in your life!


And just for fun I have to post this cute picture of one of my little pirates with her pixie dust.