Wednesday, January 29, 2025

Chocolate Macadamia Milkshale

 Nic and I went on a couples trip to Kauai. Our room wasn't quite ready when we arrived so they gave us credit at the bar. Since we don't drink, we are new to finding fun drinks at the bar. It wasn't on the menu but based on other items on the menu I asked if they could make me a chocolate macadamia smoothie. They made it for me and as they handed it to me one of the men at the bar asked what the bar tender what drink I had. Afterwards, the bartender told me all 4 of the guys ordered the drink (but added alcohol). Cracked us up they I started a little trend.

Once we got home, I couldn't find a recipe for a Chocolate Macadamia Milkshake but was determined to make one. 


Chocolate Macadamia Milkshake

Serves 4

1 C Milk (whole milk makes it richer but I also do skim)

1 1/13 Heavy Cream

1/2 cup Sugar

2 C ice

1 Cup Macadamia Nuts (I usually do an overflowing cup using the Costco bag of whole nuts if the nuts are chopped or you don't want us nutty add less like 1/2 Cup)

2 T Hot fudge (I have often done chocolate syrup which also tastes great the hot fudge just takes it up a notch)

Add all ingredients to a blender and blend until smooth.

Enjoy!

Saturday, January 12, 2019

Come Follow Me Bulletin

I have had a lot of people like our family's Come Follow Me Board and ask for details so I thought I would share.

I am using resources from one of my friend's blogs: Saving Talents


I used these adorable printables from the Red Headed Hostess

Each week I go through and print the weekly devotionals from Saving Talents and then pin them on the bulletin board. The green squares to the right of Christ, will allow us to write down any family goals, favorite scriptures, or a scripture we want to memorize. Last week, we all memorized Luke 1: 39.

We don't always do the journal entries, activities, or even song but we have the option if we have extra time. We  go over these scriptures and questions during dinner and so far it has been going really well.

For this next weeks, devotionals click this link to download the formatted Saving Talents devotionals.


Saturday, January 13, 2018

Great to be 8 Invites

Great to be 8 is coming up in Primary. I wasn't finding any invitations that I love so I decided to make my own and I really like how the turned out.

I love the Baptism song "When I am Baptized." It talks about looking for rainbows so I thought it would be fun to go off the rainbow theme.


Download Great to be 8 Invitations


Tuesday, August 23, 2016

Peach Mango Chicken

Two of my favorite fruits are peach and mango. Luckily for me, its been peach and mango season. Ever since I made strawberry jam a couple of weeks ago I wanted to try to make a peach mango jam to have with chicken.


I made my own jam using this:


I used the low sugar recipe for the peach jam, I used two peaches and one mango. Chopped them up to have about 1 2/3 c of fruit and then pureed it in my blender, (You can puree it or keep it as chunky as you want). Then I followed the recipe as indicated. (I did not add butter).

However, you could also buy a peach mango or even a peach jam to use for this recipe.


Put peach mango jam, brown sugar, soy sauce and vinegar in a glass bowl and microwave for about 20 seconds, until jam has thinned down. 


Mixture should still be thick but a smoother consistency.. Whisk in ginger, garlic, basil and red pepper flakes. 

Add chicken and marinate for 30 minutes.


 Preheat broiler to high.  Put aluminum foil in a baking dish and spray with nonstick cooking spray. Don't make my mistake and forget this! I was so busy thinking about pictures, I spaced this step and was scrubbing this dish for a LONG time!

Remove chicken from marinade and place in baking dish.. Broil about 3 inches from the heat until cooked through (about 5 minutes on each side).


Flip the chicken over and then cover with the chopped mango and peaches and sprinkle basil on top. Cook for another 5 minutes.


Peach Mango Chicken

Ingredients:

 1/4 cup peach mango jam/marmalade (homemade)
1/8 cup brown sugar
1 1/2 Tablespoons soy sauce
1/2 Tablespoon rice vinegar
 1/2 teaspoon grated ginger (I used jarred)
1 tsp minced garlic 
1/8 teaspoon crushed red pepper flakes
 ¼ teaspoon of basil
2-4 chicken breasts
Chopped up mango
  Chopped peach
Basil to sprinkle on top (optional)

Directions:
Put peach mango jam, brown sugar, soy sauce and vinegar in a glass bowl and microwave for about 20 seconds, until jam has thinned down. Mixture should still be thick but a smoother consistency.. Whisk in ginger, garlic, basil and red pepper flakes.

Add chicken and marinate for at least 30 minutes.

 Preheat broiler (or 525) to high.  Put aluminum foil in a baking dish and spray with nonstick cooking spray.

Remove chicken from marinade and place in baking dish.. Broil about 3 inches from the heat until cooked through (about 5 minutes on each side).

Flip the chicken over and then cover with the chopped mango and peaches and sprinkle basil on top. Cook for another 5 minutes.

Enjoy!


Monday, August 15, 2016

Quote Printable

Residency life is no joke, and we haven't even had it too rough yet. I was looking for decorations for our house and it was just a rough week and I thought of this quote that my mom got for our house during a really tough family time.


I decided this quote by Elder Holland would be a perfect motto this year.

Friday, March 18, 2016

Happy Match Day

Happy Match day everyone! Good luck!

Ever since we were first years, I heard about Match day and looked forward to it even though it seemed so far away. I can't believe it is already here. It has given me time to reflect on the past 4 years.

Medical school has had its challenges, and there have been times I tell people to never go into medical school. However, I also feel like we have been blessed and have benefited from this medical school journey.

When Nic and I started medical school we realized there would be times our time with each other would be limited. We made our priorities and set expectations. We decided at this point we would have dinner together as much as possible. We also decided we would cook together. Before medical school, I was not a very good cook; I think it was through our times cooking together that I developed a love for cooking and made it a talent.

We did our best to still have dinner together despite some rough schedules. On his night shifts, I would bring dinner to the hospital cafeteria so we could eat together. This had some challenges with bringing the little ones there (went even when L was only a month old), but the time made it worth it. One time I brought a pizza so we could have date night. These moments have become treasured memories and love that we were able to still have family time despite odd hour shifts. 

We have learned a lot on this journey and have grown together as a couple. Our communication has improved a ton while we have been here. Even though there have been rough times I am glad I had the chance to go through with Nic and here. We have met so many amazing people who have been so supportive.

I know residency will be rough, but I hope I can look back in 4 years and realize how much we learned and were blessed by the experience.
 
There will always be challenges in our lives but I encourage you to make the most of it. For all your other medical student wives you can do it!


Sunday, January 17, 2016

Primary Song Memory Game

Now that my daughter is getting older, I have been wanting to come up with good Sunday activities to help her better distinguish Sundays verse other days. She loves the game Memory so I thought a Primary Song Memory game would be fun. So far she is loving it.


Print the attachments on cardstock and then glue to cute scrapbook paper. Try to choose scrapbook paper that won't make matches obvious. I chose a pattern that had shapes that were random.

Memory Game Page 1


Friday, December 4, 2015

Embroidering a name on a stocking

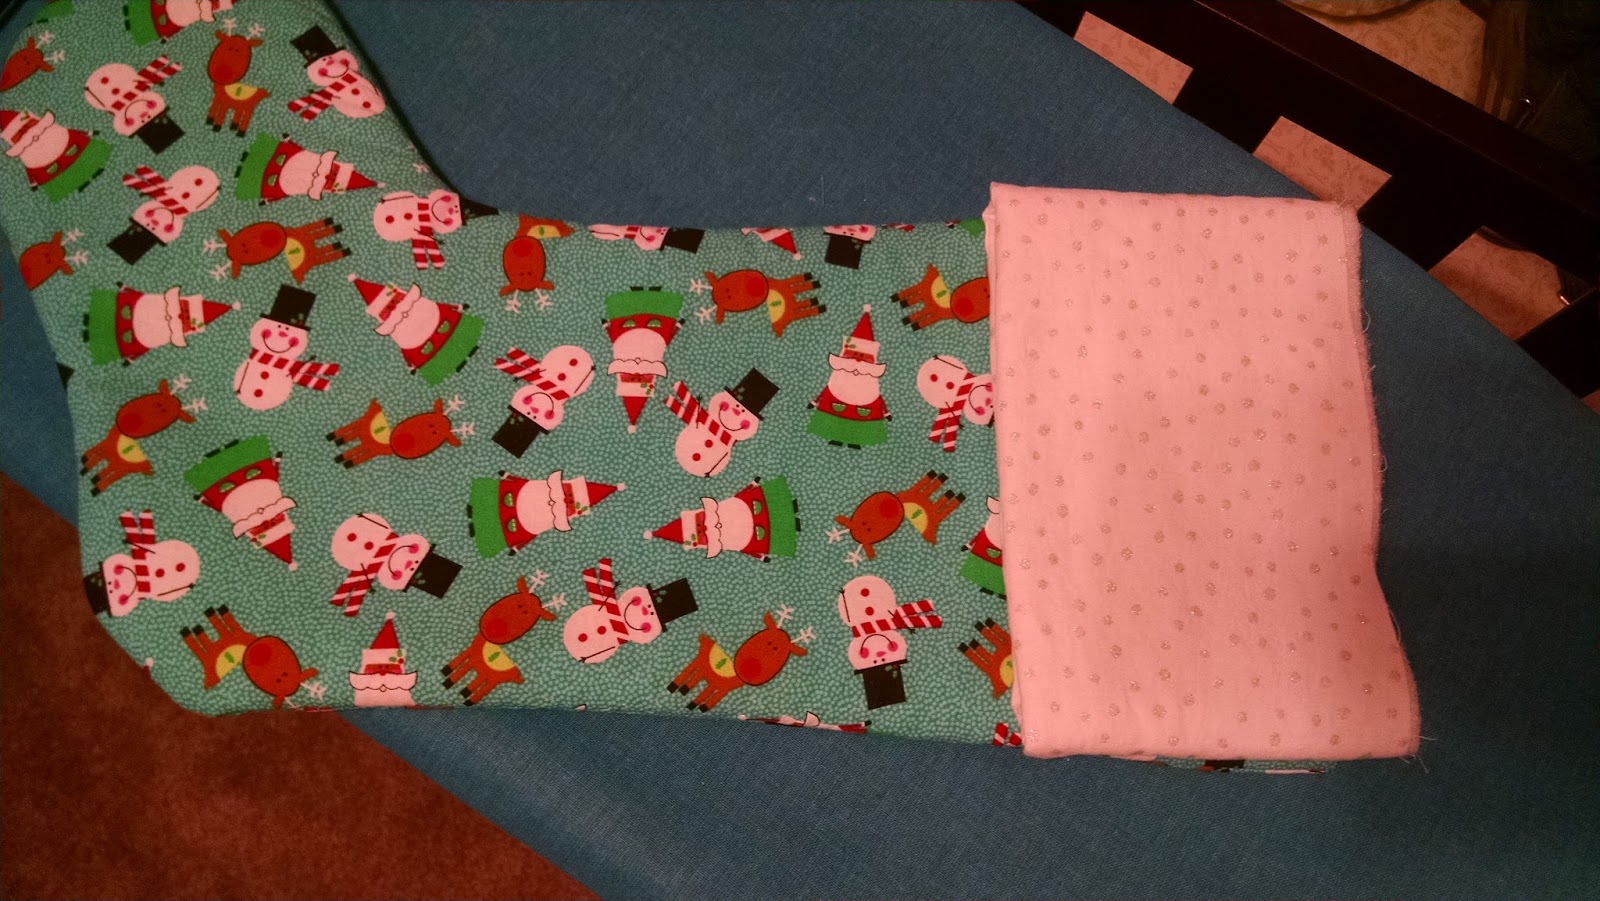
I decided when Little E was born that I would make all of us stockings, using the same pattern but everyone would have different fabric. Since we don't know how many kids we will have, I couldn't preplan and buy matching fabric so it just made it easier if everyone's fabric was different.


Now that Baby L is here, it's time she had a stocking of her own before Christmas. I went with a super easy tutorial. To be honest Nic's, mine, and Emily's stockings were all made before I had a sewing machine. I actually borrowed a friend and since it had been awhile since I had sewed I needed something simple. The only thing I didn't like about this tutorial was that she didn't show had to add names on them. So I wrote up how I added the names in case others would like to the same.

I use this tutorial:

http://blog.fabricworm.com/2010/12/christmas-stocking-tutorial.html

Make both pieces of the stocking.


 Take the cuff and pencil the name on the stocking. Cuff should be fold side down. I find it helpful to use a ruler to make sure the name is written straight. I like to lightly pencil it first so if I need to rewrite the name its easy to erase and fix, once you like how it looks you can always darken the name.


With the penciled name, I put it in the stocking, matching up the sides and put a couple of pins in and then flip out to make sure the name will look how I want it to.
 
Name should be facing you, when you put it in the stocking.


 How it looks flipped.

 
 Once you know the name is how you want it, you can start embroidering it.


Once the name is finished, put the cuff back in the stocking. Again making sure the edges line up with each other and the name is centered.

Instead of ribbon, like the tutorial says, I make my own  tie hanging using the cuff fabric. I start with a piece about 2 1/2" by 5". It seems large but with the seam allowance and flipping it right side out it ends up being about the right size. Don't worry about it being exactly the size, I feel like mine is not exact among all of the stocking, you are using scrap fabric. :)

Add your ribbon, or fabric hanging piece, to the stocking


Make sure everything is in the right spot. Finish sewing as directed in tutorial


Now enjoy your beautiful stockings!


Thursday, November 12, 2015

Baked Pizza Ziti

We love everything pizza, but sometimes you need to serve something besides regular pizza for dinner. This Baked Pizza Ziti is a family favorite and also makes a great freezer meal. This recipe can make a 9 x 13 pan or if you have a smaller family like mine you can make 2 8 x 8, and throw one in the freezer.


Ingredients:

Heat pan to medium heat and cook the ground beef, pepper and onion together. Cook the meat until almost done- hardly any pink. Then add garlic. Cook until completely cooked, add salt and pepper to taste. Drain the grease.


 Cook pasta and then mix sauce and pasta together. Put about 1/2 in a 9 x 13 pan or about 1/4 if splitting the recipe.

Sprinkle about 1/2 (or 1/4 of the cheese) over the pasta.

Add the pepperoni.


Then add the meat mixture.

Spoon the ricotta cheese over the meat mixture.
 Add the rest of the pasta, the meat and more pepperoni.
 Cover the dish with mozzarella cheese. (Try to make sure no noddles are sticking out, otherwise they may get dried out in the oven.
 Since my family doesn't need a full 9 x 13 pan, I make 2 8 x 8 s and put one of them in the freezer and eat one the night I make it.


Cook for about 35-40 minutes if doing a 9 x 13 pan, or about 20-30 minutes if doing the 8 x 8 pan. Cook until all of the cheese is melted and turning slightly golden.


Baked Pizza Ziti
Recipe by Prescriptions for a Happy Home

Ingredients:
26- 28 oz of your favorite spaghetti sauce
1 lb of ground beef
1 green pepper
1 onion
1 15 oz container of ricotta cheese
1 package of pepperoni
1 16 oz package of ziti or other tubular pasta
16 oz of shredded mozzarella cheese
1 tsp of garlic

Directions:
Preheat over to 350 degrees.

Cook pasta until al dente.

Heat pan to medium heat and cook the ground beef, pepper and onion together. Cook the meat until almost done- hardly any pink. Then add garlic. Cook until completely cooked, add salt and pepper to taste. Drain the grease.

Mix sauce and pasta.

Lightly grease a 9 x 13 pan (or 2 8 x 8 pans).

Pour 1/2 of the pasta into the 9 x 13 pan. Then about half of the mozzarella cheese. Evenly spread the pepperoni over the pasta and cheese. Sprinkle the meat mixture on top. Spoon ricotta cheese on top of the meat. Put the remainder pasta mixture on top. Sprinkle the rest of the meat. Then spread the pepperoni on top of the meat. Cover the entire pan with mozzarella cheese.

Cook for about 35-40 minutes until cheese is melted and bubbly. (If cooking the 8 x 8 pan cook 20-30 minutes)

Serves about 8.

*When you are ready to cook the freezer meal, put in fridge about 24 hours before serving. Cook at 350 for 30-40 minutes - until cheese is melted and no longer frozen.

Enjoy!


Thursday, October 8, 2015

Chocolate M&M Cookies

I love chocolate cookies, and chocolate cookie dough. :) These cookies will not disappoint if you like soft cookies! And I won't blame you if you eat all of the cookies dough before any of it makes it into the oven.


There is vanilla pudding in the mix, which helps make these cookies soft and chewy instead of crunchy.

I use the brand Jello:


I generally get one of the larger boxes and put it in a Tupperware container, so I always have vanilla on hand when I make cookies and the vanilla doesn't go to waste.

We are kind of obsessed with our silpat in our home, and use it for cooking everything, especially cookies, if you don't have one I highly recommend them.


Chocolate M&M Cookies
Recipe by Prescriptions for a Happy Home

1/2 c softened butter
1 c sugar
1 egg
1/2 tsp vanilla
1/2 tsp baking soda
1/2 tsp salt (unless using salted butter like I do. )
2 tablespoons vanilla pudding mix
1/2 c cocoa
1 1/4 flour
1/2 cup chocolate chips
1/2 cup mini M&Ms (regular would work too)


Cream sugar and butter together.. Mix in egg and vanilla. Then add baking soda, salt, vanilla. Slowly add cocoa and flour.

Cook on silpat mat at 350 for 8-10 minutes. Cookies will be soft but with solidify as they sit. Keep on cookie sheet for a couple of minutes.

These cookies only make a couple of dozen, since I have no self control. ;)

I generally make a couple at a time, and then store the dough in an air tight container in the fridge until I make the next batch. Warm cookies every time without becoming a hoarder. 

Enjoy! 


Wednesday, September 16, 2015

Pizza Dip


Today I am sharing our favorite football party appetizer.  We love this pizza dip! It is so good and really simple to make.  Make this dip for your next football party, it is sure to be a winner!


Start by combining an 8 oz block of cream cheese (regular or low fat) with some oregano, parsley, and basil.  Spread into a greased 8 or 9 inch baking dish. I like to use my deep pie pan for this dip. 

 Next, sprinkle 1/2 cup each of mozzarella and Parmesan cheese on top of the cream cheese.

Spread 1 cup of pizza sauce evenly over the cheese.

Top with another 1/2 cup each of mozzarella and Parmesan cheese and then the pepperoni and other toppings. We usually just use pepperoni, but other pizza toppings are fun to try.

Bake, uncovered, at 400 degrees for 15-20 minutes or until the cheese is melted and bubbly.  Yum!

Serve with toasted baguette slices.


Enjoy!


Pizza Dip
Recipe by : Prescriptions for a Happy Home

Ingredients:
1 8oz. block of cream cheese, at room temperature
1/2 tsp. oregano
1/2 tsp. parsley
1/4 tsp. basil
1 c. shredded mozzarella cheese, divided
1 c. shredded Parmesan cheese, divided
1 c. pizza sauce
1/2 c. pepperoni (we like to use the mini pepperoni, but regular pepperoni works great, too)
2 T. each additional pizza topping, optional

1 loaf baguette or other crusty bread, toasted


Directions: In a small bowl combine the cream cheese with the oregano, parsley, and basil.  Spread evenly into a greased 8 or 9 in square or round baking pan. (I sometimes use a pie pan) Sprinkle 1/2 cup of each cheese on top.  Spread the pizza sauce on top of the cheese.  Sprinkle the remaining cheese on top of pizza sauce, followed by the pepperoni and other pizza toppings if you are adding additional toppings.  Bake at 400 for 15-20 minutes, until the cheese is melted and bubbling.  Serve with toasted bread.